Monday, April 26, 2010

Daring Bakers: British Pudding

The April 2010 Daring Bakers’ challenge was hosted by Esther of The Lilac Kitchen. She challenged everyone to make a traditional British pudding using, if possible, a very traditional British ingredient: suet.

First of all, Happy Anniversary to me. This is my one-year anniversary of belonging to the Daring Bakers. I’ve baked everything from Milanos to marshmallows, and I’ve loved (just about) every minute of it. And I’d guess my neighbors have been pretty pleased as well.

Anyone that knows me knows I love food. I’ll try anything once. Not that I’m comparing British pudding to, say, roasted bone marrow…


…which I tried last week, when my equally food-adventurous husband decided to make it for us. Let me delay the story of my pudding to say a few words about roasted bone marrow.

No matter what it looks like, how uncomfortable it might be to dig gelatinous, fatty marrow out of the bone of a cow, it tastes good; paired with toasted French bread and a salad of sorts made of parsley, capers, shallots, and lemon vinaigrette, it’s salty, complex, and rich. I enjoyed it. There, I said it. I’d eat it again, but I doubt I’d order it at a restaurant, as there are so many other things I haven’t tried and food that I like a lot more than bone marrow. But I’ve tried it, and I’m glad to be able to make that claim.

So I suppose this month’s theme is fat, because my challenge is steamed pudding made with suet. Suet is the hard fat found around the kidneys of a cow or sheep. Before adding it to a recipe, it must be rendered.

Sifting the flour, salt, and baking powder…

Measuring the molasses…


The recipe I chose was a variation on a basic pudding recipe. I chose the ginger version, which instructed me to replace the sugar with molasses. My gut told me I’d regret that, but I was a good girl and I followed the recipe. (Oh, that good girl has GOT to go.)

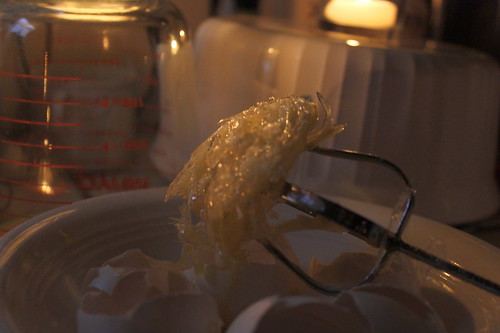
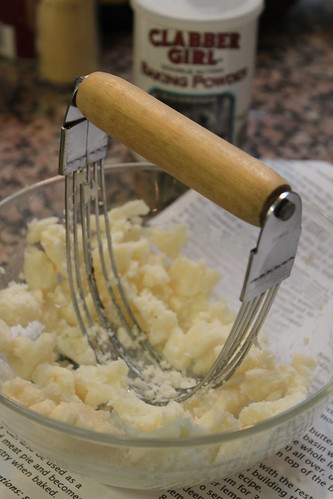
The suet, after being in the refrigerator overnight, has the consistency of frozen butter.


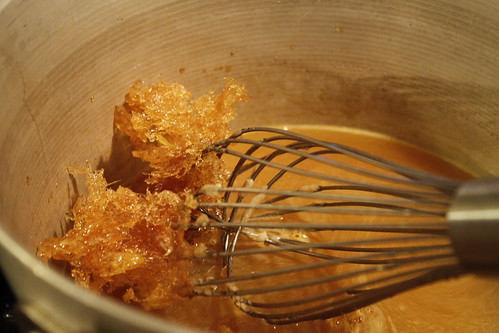
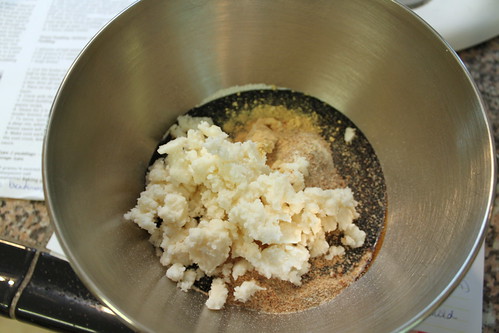
Adding molasses, suet, bread crumbs, and ginger to the flour mixture.

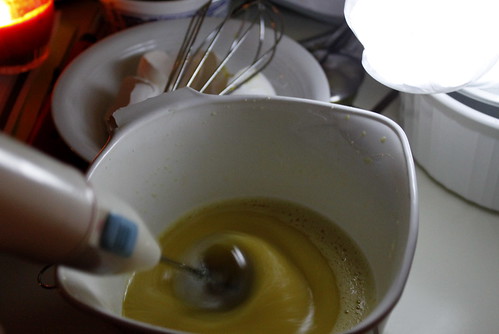
Mixing in milk and egg.

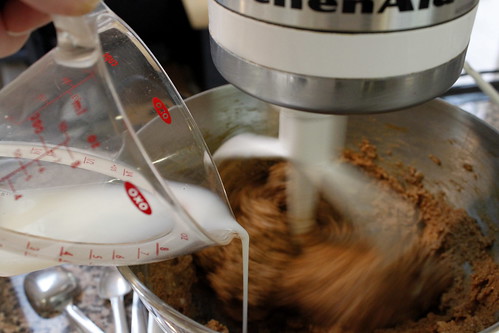
All those years of collecting cake pans has paid off! (Too bad I don’t have the lid that goes with it.)


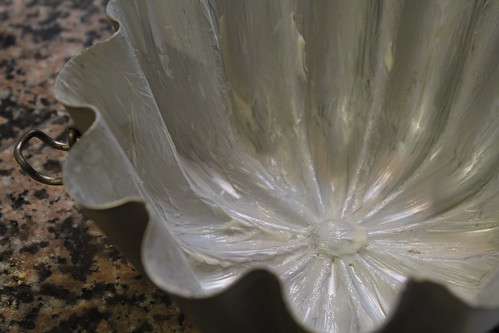
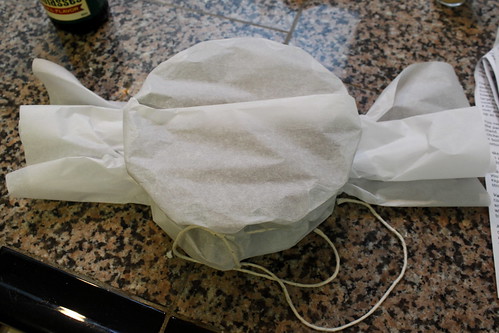
Since the pudding is to be steamed and I have no lid for my pudding mold, I cover it with parchment paper and tie it off with string. It reminds me of a piece of hard candy or taffy.

The paper gets trimmed and set onto an upturned bowl in a pan of simmering water.

Two-and-a-half hours later…

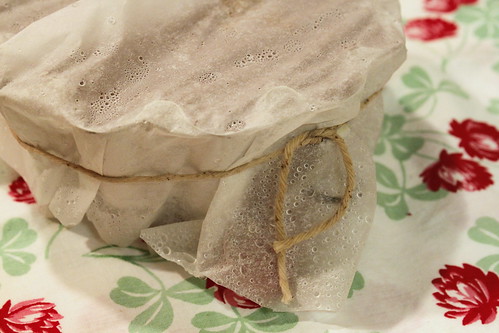
…it falls out of its mold, no problems.

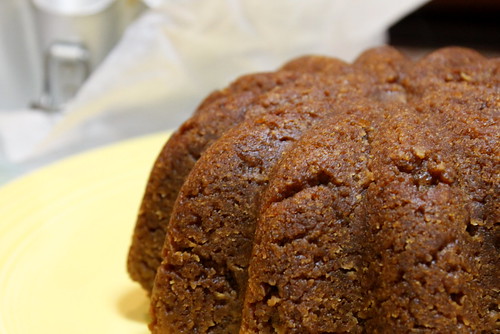
It was late and I wasn’t up to making any kind of sauce or topping for it, so I saved it for the next day. Though I did sneak a thin slice off the bottom, because how could I wait 24 hours?!

Sadly, I was disappointed. Remember that gut feeling I had about the molasses for sugar? It just wasn’t sweet enough. And it was overcooked. But it smelled just like the brown bread from a can I remember from my childhood.

Though when in my childhood is unclear. Maybe we used to take it camping?

In the end I decided it wasn’t worth the extra time (and sugar – remember, I’m supposed to be eating foods low on the glycemic index) for a sauce, so I skipped it. Maybe I’ll moisten it up a bit by putting it in the toaster and adding butter. I mean, margarine.

So while this challenge wasn’t really a success in my view, I did learn how to steam cook, and I’ll definitely be trying my own brown bread sometime.

Steamed Suet Pudding

  • 100 grams/4 oz. all-purpose flour
  • 1/4 tsp. salt
  • 1 1/2 tsp. baking powder
  • 100 grams/4 oz. bread crumbs
  • 75 grams/3 oz. Caster sugar
  • 75 grams/3 oz. Shredded suet or suet substitute (i.e., Vegetable Suet, Crisco, Lard)
  • )1 large egg
  • 6 -8 T cold milk

1. Sift flour, salt and baking powder into bowl.
2. Add breadcrumbs, sugar and suet.
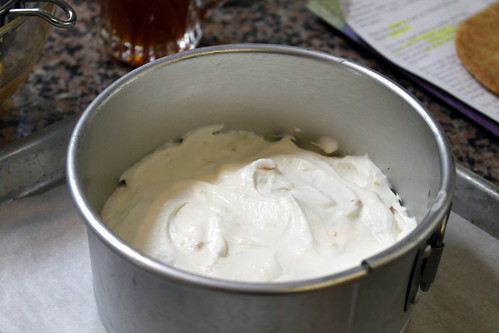
3. Mix to a soft batter with beaten egg and milk
4. Turn into a buttered 1 litre/ 2pint pudding basin and cover securely with buttered greaseproof paper or aluminum foil.
5. Steam steadily for 2.5 to 3 hours
6. Turn out onto warm plate, Serve with sweet sauce to taste such as custard, caramel or a sweetened fruit sauce.

Variants:
Spotted Dick - Add 75g/3oz. currants and 25g/1 oz. of mixed chopped peel with the sugar.
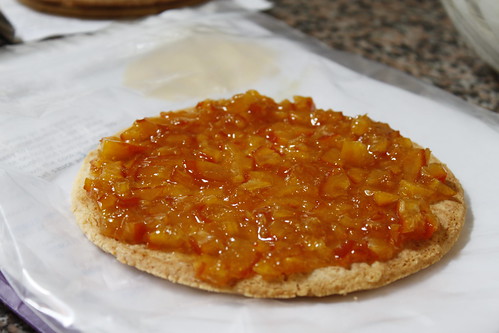
Syrup or Treacle or Marmalade Pudding – put 2 T of golden syrup, treacle, or marmalade at the bottom of the bowl before adding pudding mix.
My Fair Lady Pudding – Add finely grated rind of 1 medium orange or lemon with the sugar.
Ginger Pudding – replace the sugar with 100g/4oz. of treacle, and add 1/2 tsp. ground ginger.

Sunday, April 18, 2010

Reality Check

In an effort to get back to healthy(er) eating, I’ve pulled my Living the G.I. Diet book off the shelf and am reacquainting myself with its principles.


Basically low-fat, high protein, low sugar. Seems kind of obvious, I know, but it works better for me if I have rules to follow. I've mentioned this diet before, I think. I found it about five years ago and managed to lose a good 30 pounds. For the most part I've stuck to the rules about whole grains and low fat, but I've slowly let sugar creep back into my life, and it's time to get a grip.


The book lists red-, yellow-, and green-light foods – “red-light foods which you avoid if you want to lose weight; yellow-light listings are foods that are to be used occasionally; and green-light foods – eat as much as you like.”


Meanwhile, I’m still faithfully reading baking blogs, while King Arthur and The Joy of Cooking, among others, taunt me with the delicious high-fat, sugar-laden recipes they post on Facebook every day.


So many recipes to try, but no legitimate reason to try them. It’s been rough!


I found a recipe for Crustless Fruit-Topped Cheesecake in my G.I. book. And lucky me, it was green-lighted. I had everything but low-fat cream cheese, so I picked up some Neufchâtel on the way home from farmers’ market.

One thing I’m having some difficulty with is the use of sugar substitute. It seems to me if the goal is to eat whole, unprocessed foods, why should Sucralose be okay? It shouldn’t. Despite that, I used it this time, in an attempt to keep with my follow-the-recipe-the-first-time rule.


I don’t know why I used the blender, of all things, to puree the cottage cheese.


I added cream cheese, and instead of using flavored yogurt, as called for in the recipe, I mashed some of the huge flat of strawberries I bought at Costco yesterday...


...added a tiny bit of honey...


...and mixed that with nonfat, plain yogurt.


After adding the cream cheese and realizing the blender was NOT the appliance I needed to be using for this task, I added the remaining ingredients – flavored yogurt, cornstarch, “sugar”, egg whites, vanilla, salt – and switched to an immersion blender. Muuuuch better.


The recipe instructed me to use a 9” springform pan, but all I have are 12” pans and various smaller cake pans, so I opted for two small cake pans and fashioned a sort of handle system with parchment paper just in case I couldn’t get them out.


From there they went into a hot water bath and into the oven.


I baked them for 40 minutes, ran a knife along the edge of the pan, then let them sit in the turned-off oven for another 30 minutes before pulling them out to cool.


I have to say, the finished product was pretty damn good. Sure, it's missing a buttery homemade graham cracker crust, but the texture is good, it's sweet enough, and definitely satisfies those nighttime sugar cravings. This is one experiment that won't get shared with the neighbors.


Crustless Fruit-Topped Cheesecake


  • 16 oz. 1% cottage cheese (I used nonfat)
  • 8 oz. light cream cheese, softened
  • 1 c. nonfat, fruit-flavored yogurt with sweetener (I added fresh fruit and a tiny bit of honey to plain, nonfat yogurt)
  • ¾ c. sugar substitute
  • ¼ c. cornstarch
  • 2 egg whites
  • 1 T vanilla extract
  • Pinch of salt


Fruit Topping


  • 4 c. fresh berries
  • 2 tsp. fresh lemon juice
  • Sugar substitute to taste (I used just a couple tablespoons of honey)

  1. Preheat the oven to 325.
  2. Puree the cottage cheese in a food processor until very smooth. Add the cream cheese and puree until smooth and combined. Add the yogurt, sugar substitute, cornstarch, egg whites, vanilla, and salt and puree until smooth.
  3. Pour the batter into a greased and parchment-lined 8- or 9-inch springform pan. Wrap the pan with aluminum foil so that the bottom and sides of the pan are covered. Place in a large roasting pan and fill the roasting pan with hot water to come halfway up the side of the springform pan.
  4. Bake until the center is still slightly jiggly when the pan is tapped, about 40 minutes. Turn the oven off and run a small knife around the edge of the pan. Let the cake stand in the cooling oven for about 3 minutes more. Ro a rack and let cool to room temperature. Cover and refrigerate until chilled, about two hours.
  5. Make the fruit topping: In a large bowl, combine the berries, lemon juice, and sugar substitute. Cut the cheesecake into wedges and serve with the fruit topping.

Variations: For a vanilla cheesecake, use plain or vanilla yogurt and add up to 3 tablespoons of vanilla; for espresso cheesecake, use plain yogurt plus 1 tablespoon espresso powder and 1 tablespoon vanilla.


Keep the cheesecake covered and refrigerated for up to three days.


Wednesday, April 14, 2010

Blackout Baking

I recently spent about ten days at my childhood home in Northern California. Not technically a vacation because I took my office with me and worked from there, but when you go to the beach almost every day, or at least get to see it while running errands, it sure makes working every day a lot more tolerable.

One of the downsides to living in such a beautiful, remote location with lots of trees and offshore winds is the occasional loss of electricity. It happened while we were there; in the middle of my shift, in fact. I borrowed a neighbor's generator and got a couple more hours of work in before the phone line went out and I had no choice but to give up the rest of my shift.

So the electricity is out, but I have a cake to bake for a get-together the next day. Thankfully Mom has a propane stove, so I'm thinking, "No problem -- I'll just hand-mix my ingredients."


Before I get too far into this project I realize the sun is about to set. We're within earshot of the ocean, very close. So we jump in the car and drive down the road to the nearest accessible cliff to watch...

When we get home, my husband crafts a little lamp shade for one of his LED flashlights so I can keep an eye on the melting chocolate.

What I don't realize yet is what I've planned to bake -- Marcy Goldman's Truffle Cake from The Best of BetterBaking.com -- requires a LOT of mixing. I mean, a LOT. I start out with a hand whisk, but as I'm rummaging around Mom's kitchen looking for utensils, I find a battery-operated hand mixer. Perfect.

Except it's taking for-EV-er for the five eggs to "triple in volume." I mean, for-EV-er.

After a while I decide it's good enough, and enlisting my husband to help, I give him the task of holding the flashlight and slowly pouring hot corn syrup and sugar into the eggs while I continue mixing.

Unfortunately my little hand mixer isn't quite up to the task, and the sugar hardens before I can get it incorporated into the eggs.


So my blackout baking experiment was a failure, and I had a huge mess in a dark kitchen, with only limited amounts of water for washing dishes. I put as much as I could in the dishwasher and saved the rest for the next day, when (hopefully) power would be restored.

Luckily I still had melted chocolate that hadn't been sacrificed to the corn syrup debacle, and the next morning after the electricity had been restored, I tried again. And I'm happy to report, it was a success.

I made three small cakes from one recipe. One I took to the friend who requested the cake in the first place; one I took to the neighbor who loaned me her generator; and the third I took to share with my dad when we went out to dinner our last night in town. And yes, similar to cork fees, there was a "cake fee" of $2.50 each. But I'm guessing something as decadent as this truffle cake would have cost double that.

Next time the electricity goes out I'll stick to something that's easily mixed by hand, like cookies.

Tuesday, April 6, 2010

Daring Bakers: Orange Tian

The 2010 March Daring Baker’s challenge was hosted by Jennifer of Chocolate Shavings. She chose Orange Tian as the challenge for this month, a dessert based on a recipe from Alain Ducasse’s Cooking School in Paris.

I wasn’t as excited for this challenge when it was announced, and I kept asking myself why. Am I that enamored with chocolate? I’ve never thought of myself as a chocoholic, and while I don’t dislike oranges (let's be real -- is there any food I really dislike?), I just couldn’t get excited about this challenge. I almost skipped it, but my husband kept encouraging me to try it, so I persevered. Though I did take a couple days to bake and assemble everything.

First I had to look up the definition of “tian.” Basically it’s a layered casserole. In this case it’s a layered dessert consisting of a sweet pastry cookie layer on the bottom, followed by orange marmalade, whipped cream flavored with more marmalade, topped with orange segments that have been soaked in caramel. Sounds relatively easy enough, despite the fact I’d never segmented oranges.

First the marmalade.

Slice the oranges, blanch them three times, add sugar, orange juice, and pectin. The instructions told me to cook it "until the mixture reaches a jam consistency.” Well, I’ve never made jam (maybe I have, but it’s been a long time), so I kept waiting for it to thicken. It didn’t, so I kept adding more and more pectin. Finally it thickened up a little, so I poured it into a bowl and put it in the refrigerator overnight. The next morning I had this…

So I decided to make this…

…and I attempted the marmalade again, this time with success.

The next day I made the pâte sablée. I didn’t have the multiple cookie cutters the recipe called for to make individual tians, so I used a couple small springform pans, and made a couple cookies with the leftover dough.

Segmenting oranges was the next task. I watched a how-to video and thought it looked easy enough, but I think I need a sharper and/or serrated paring knife. After the first couple it got easier, but it was definitely a challenge. Despite that, I did enjoy photographing the oranges.


If I’d thought about it, I would have used all the peels as stove-top potpourri, because there was a LOT of waste.

The caramel was another challenge part of the challenge. I never saw the sugar “bubble and foam,” so the first batch burned. I started the second batch, but the minute I added the orange juice, it hardened. Was it supposed to do that?

Now what? I decided not to add the remaining orange juice, but instead melted what I had and used that. (I don’t know what my logic was there. Why didn’t I keep adding the juice and melt all of it??) It seemed to have worked, however, and I had enough to soak the orange segments and have enough left over to pour over the top of the finished dessert.

Now for the fun part – assembly. I staged this shot for my scavenger hunt item, “under construction.”

First the oranges are arranged in the bottom of the pan.

Then the marmalade-flavored whipped cream…

Then more marmalade on the pâte sablée.

That gets turned upside down onto the whipped cream…

…and the whole thing goes into the freezer.

The recipe instructed me to place the whole thing in the freezer for 10 minutes or so, but my work schedule didn’t allow that, and it was in there a few hours before we had a chance to eat it.

It still tasted delicious, and my husband likened it to a 50/50 bar.

In the end, as always, I’m glad I made it. If nothing else I learned how to segment oranges, and I’m looking forward to adding citrus to my next salad. Plus I made brownie points with the neighbors, who got the extra orange tian.